Sense check that the below is configured in ATS Control – if not follow the steps to add in.
This should already be done for all existing & new JTGO clients. Moving forward, this will automatically be activated for all JT7 clients. Please ensure the below is set up correctly in ATS Control.
Vonq Config
Go to Client Configuration and add the below:
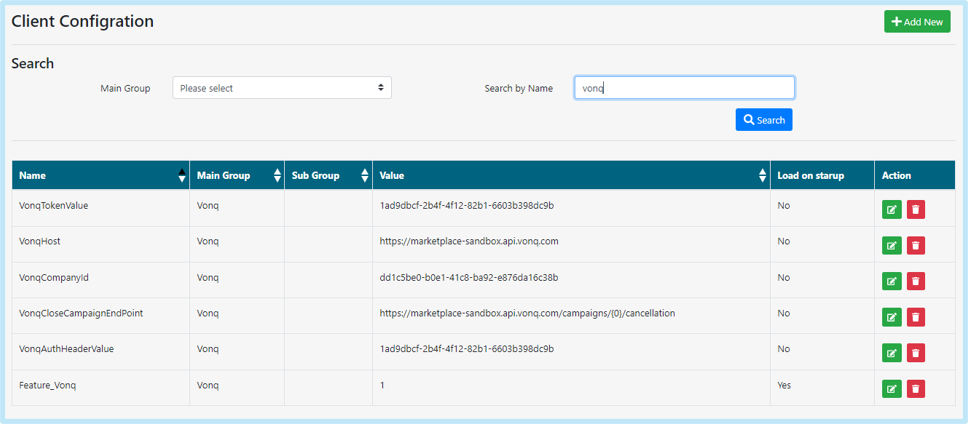
- Name: VonqHost
- Main Group: Vonq
- Value: https://marketplace.api.vonq.com
- Name: VonqCompanyId
- Main Group: Vonq
- Value: dd1c5be0-b0e1-41c8-ba92-e876da16c38b
- Name: VonqAuthHeaderValue
- Main Group: Vonq
- Value: 9df9aeb7-888b-42d8-a6d0-1dfecdf79b6e
- Name: Feature_Vonq
- Main Group: Vonq
- Value: 1
- Load on Start up: This should be enabled
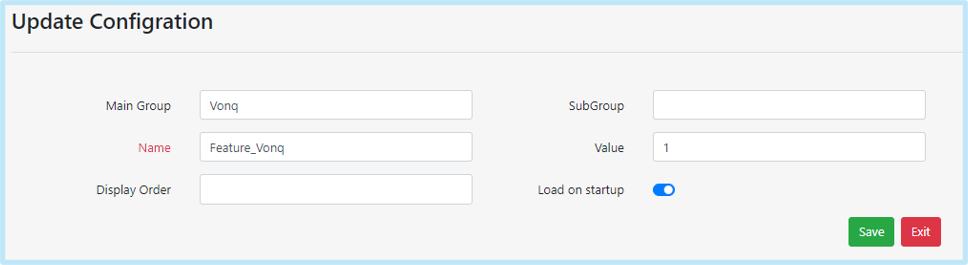
- Name: Logos_Settings
- Main Group: Vonq
- Value: ByCompany
- Name: VonqCloseCampaignEndPoint
- Main Group: Vonq
- Value: https://marketplace.api.vonq.com/campaigns/{0}/cancellation
Stripe Config
Go to Client Configuration and add in the below:
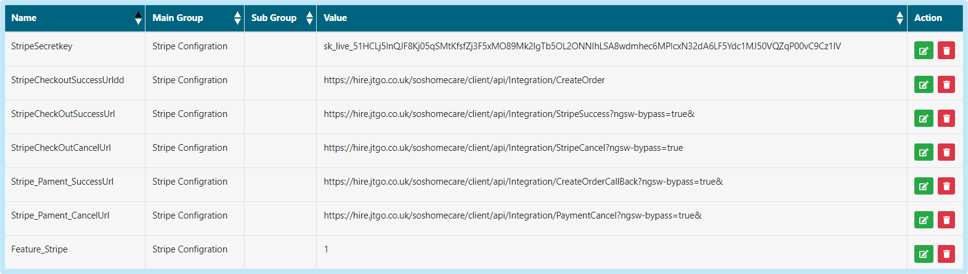
- Name: StripeSecretkey
- Main Group: Stripe Configration
- Value: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
- Name: StripeCheckoutSuccessUrldd
- Main Group: Stripe Configration
- Value: CLIENTURL/client/api/Integration/CreateOrder
For example: https://hire.jtgo.co.uk/soshomecare/client/api/Integration/CreateOrder
- Name: StripeCheckOutSuccessUrl
- Main Group: Stripe Configration
- Value: CLIENTURL/client/api/Integration/StripeSuccess?ngsw-bypass=true&
For example: https://hire.jtgo.co.uk/soshomecare/client/api/Integration/StripeSuccess?ngsw-bypass=true&
- Name: StripeCheckOutCancelUrl
- Main Group: Stripe Configration
- Value: CLIENTURL/client/api/Integration/StripeCancel?ngsw-bypass=true
For example: https://hire.jtgo.co.uk/soshomecare/client/api/Integration/StripeCancel?ngsw-bypass=true
- Name: Stripe_Pament_SuccessUrl
- Main Group: Stripe Configration
- Value: CLIENTURL/client/api/Integration/CreateOrderCallBack?ngsw-bypass=true&
For example: https://hire.jtgo.co.uk/soshomecare/client/api/Integration/StripeSuccess?ngsw-bypass=true&
- Name: Stripe_Pament_CancelUrl
- Main Group: Stripe Configration
- Value: CLIENTURL/client/api/Integration/PaymentCancel?ngsw-bypass=true&
For example: https://hire.jtgo.co.uk/soshomecare/client/api/Integration/PaymentCancel?ngsw-bypass=true&
- Name: Feature_Stripe
- Main Group: Stripe Configration
- Value: 1
- Load on Start up: This should be enabled
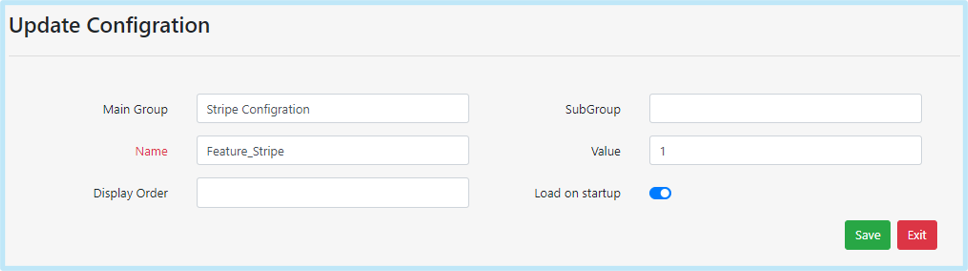
Client-Side Configuration
Credit Card & Post Via Job Board Marketplace access
This should already be done for all existing & new JTGO clients but documented for reference and for when it’s rolled out to Jobtrain clients.
In JTGO all HR Superusers will automatically get access to add a credit card & post via Job Board Marketplace (this should auto-populate from the JTGO Template site).
For Jobtrain Clients you will need to confirm with the client which users should have access to these.
Security Roles
Enable the following in Security Roles:
Jobs & Talent Pools:
- Stripe – Payment
Settings:
- Job Board Marketplace - Products
- Job Board Marketplace - Campaigns
- Job Board Marketplace – Logos
Create Update Job(s)
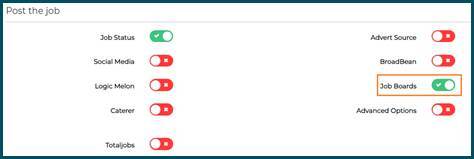
- Within the Post the job section enable Job Boards (this may already be enabled as it also links to job board multi posting via idibu)
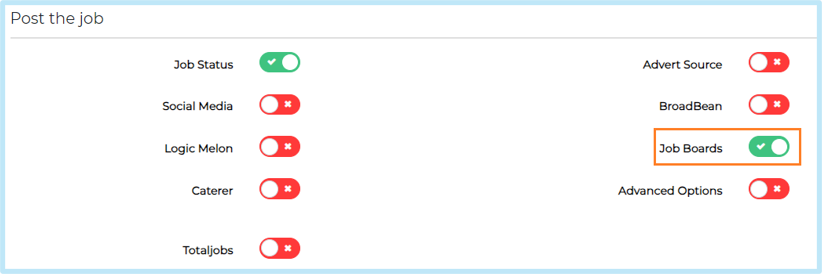
Adding Client Logo
Go to:
- Settings
- General Settings
- Upload a client logo to Marketplace Logos (use same client logo that has been used on the candidate site)
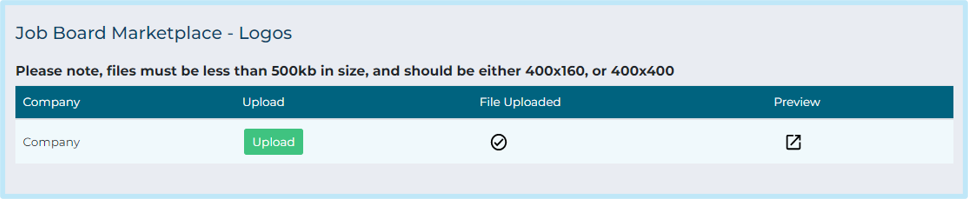
Additional Logos
If clients would like to display different logos dependent on department or division then this is possible as there are three ways, we can add logos for the marketplace.
These are the logos which would show in the adverts that the client purchases, such as on Indeed/LinkedIn etc.
To change between the options (if a client wants to), go ATS Control > Client Config > Logo-Settings (under the Vonq group).

- Company (ByCompany in ATS Control) – This is the default. Gives one option to upload one logo in General Settings, and this logo will show for any advert purchased via this integration.
- Department (ByDepartment in ATS Control) – This gives you an option for each department a client has, and the ability to upload a different logo for each one. So if a job in Communications is advertised, it could have a different logo to one purchased by an Administration job.
- Division (ByDivision in ATS Control) – Same as department, just for all the different divisions.
Update Hubspot
Update the company's record in Hubspot to advise that this has been activated:
Hubspot link: https://app.hubspot.com/
- Search for the company
- Click on company name
- Click ‘View All properties’
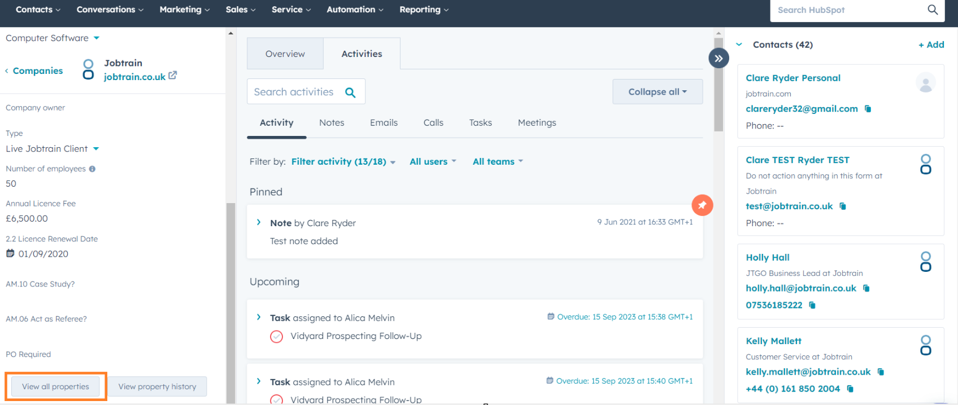
- Search for Job Board marketplace
- Select Activated from the dropdown menu
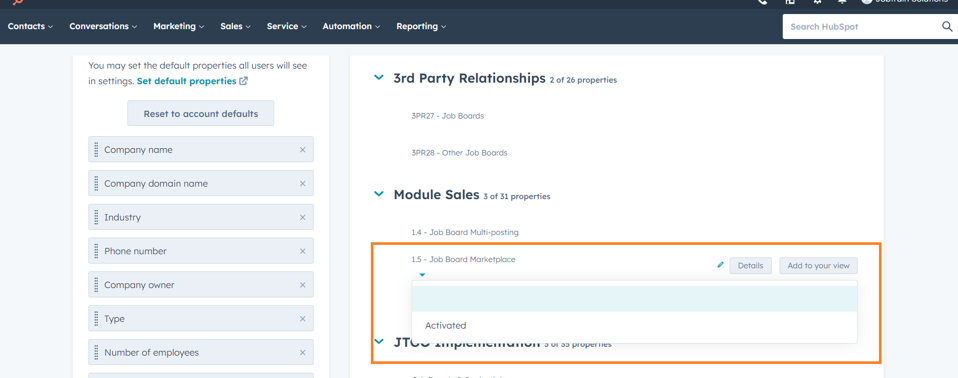
TIP: Click Add to your view so that in future this option will automatically display in the left-hand panel of the company record when you next access a company record.
Testing
Clients need a live, advertised job to test if the integration is working.
- Edit Job
- Post The Job page
- Enable toggle next to Manage Advertising
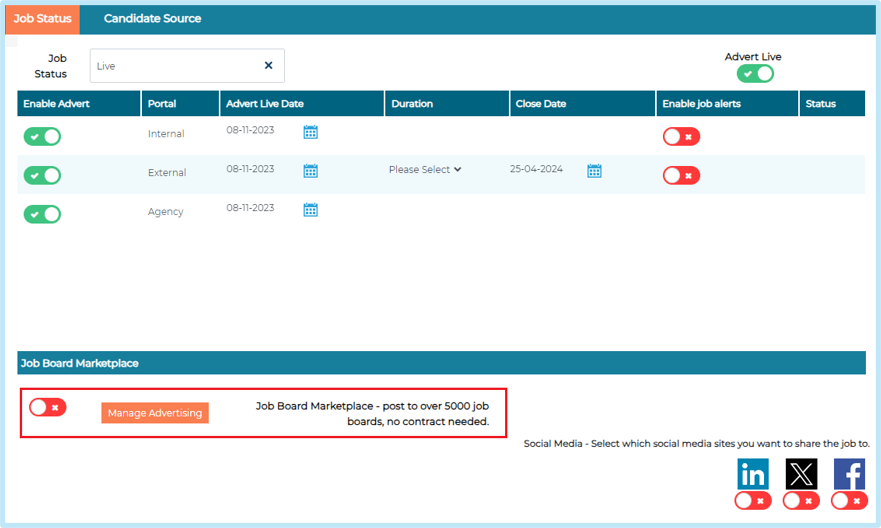
- Enter search criteria:
- Enter Location
- Enter Job function
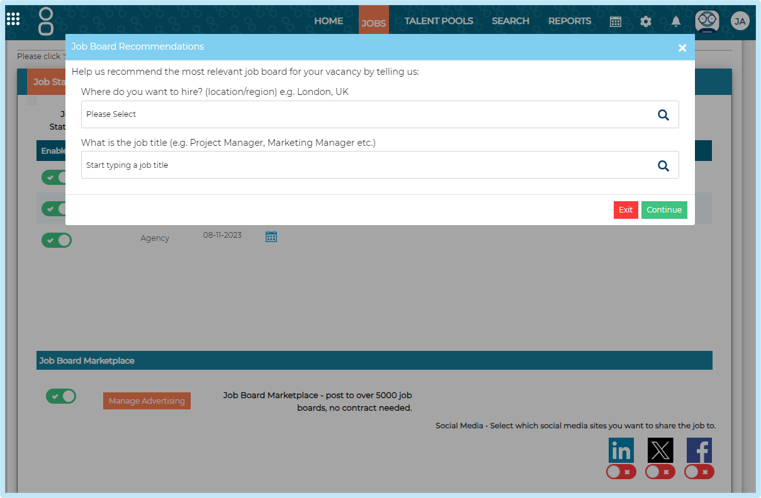
If all is working, should see data being returned from Vonq – if you encounter any issues and have checked the config is correct in ATS control please raise a service task for dev.
Please note: Manage Advertising should only display on the post the job page for users if:
- Feature_Vonq is enabled in ATS control
- AND
- The user has been given access in Security Roles > Create / Update jobs > Post the job > Job Boards
Handover to Client
Once activated, update the client ensuring you share the relevant client user guide & offer a demo to walk through how this feature works.
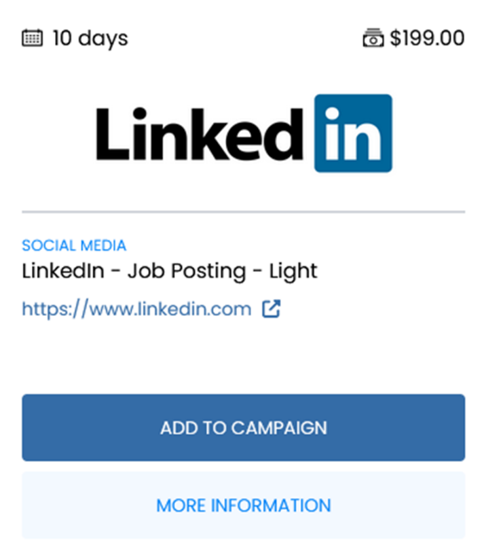
In the Job Board Marketplace (head to the post the job section in Jobtrain) use the job post - LinkedIn – Job Posting – Light. This will add the post to your company’s LinkedIn page and the jobs section in LinkedIn. Simply make the initial payment, then tell your CIC (Continuous Improvement Consultant) or our support team and we’ll arrange the refund.
How to get a free LinkedIn campaign
- Choose a job to advertise
- Purchase the LinkedIn - Job Posting - Light
- Inform your CIC or our support team of the purchase
- Get a refund
This is a limited time offer until 6th July 2024!